Step-by-Step Guide: How To Empty Your Android Device's Cache

Step-by-Step Guide: How To Empty Your Android Device’s Cache
Quick Links
Key Takeaways
- Clearing the cache on an Android phone can solve various phone issues and create more storage space for new apps.
- To clear app cache, go to Settings, select “Apps,” sort by size, choose the app, go to Storage, and tap “Clear Cache.”
- To clear browser cache, open the browser’s settings, select “Privacy and Security,” choose “Clear Browsing Data,” customize the options, and clear the cache.
Clearing the cache on an Android phone allows you to fix various phone issues and free up your storage space . Cache files are temporary and can be deleted without disrupting your apps. Here’s how to clear your app and browser cache on Android.
How to Clear the App Cache on Android
You can clear the app cache on your Android phone to fix their issues as well as make room for new apps on your device.
In this guide, we’ve used a Samsung Galaxy phone for demonstration. The steps will vary slightly depending on your phone model, but you’ll have a general idea as to what option to choose.
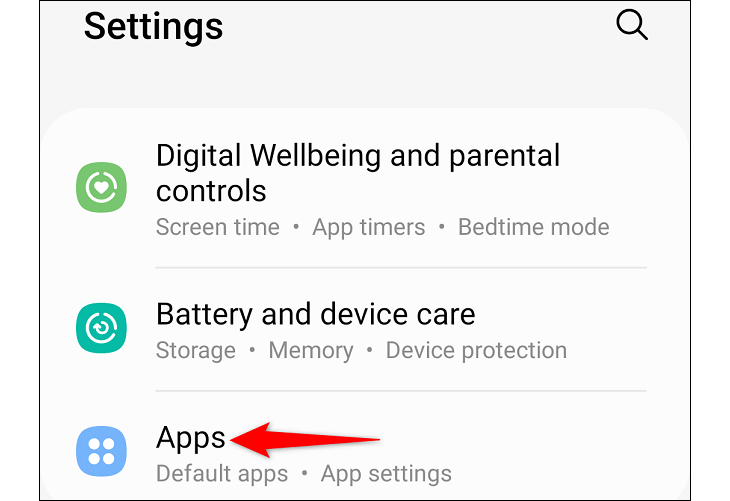
To start, launch the Settings app on your Android phone. Then, select “Apps.”
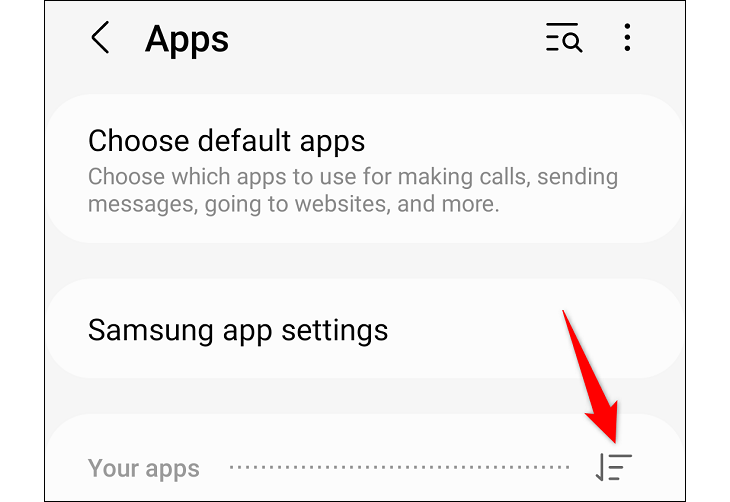
On the “Apps” page, next to “Your Apps,” choose the hamburger menu (three horizontal lines).
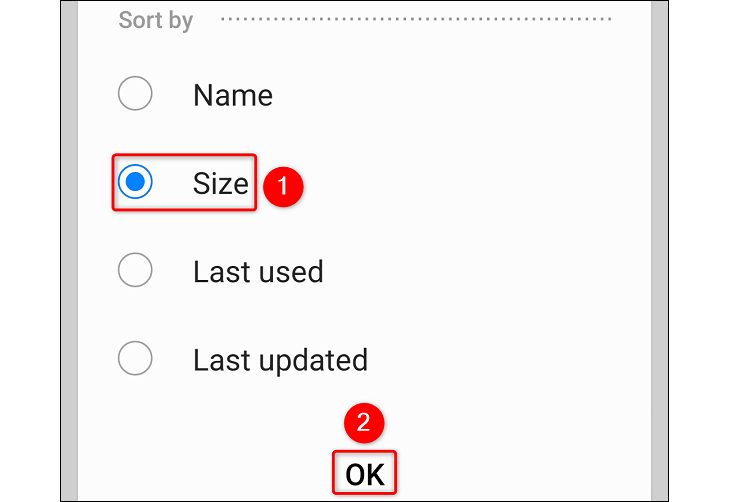
You’ll now sort your apps by their size so the largest app appears at the top of the list. Note that this doesn’t necessarily put your largest cache-occupying app at the top, but still, this helps.
In the menu that opens, in the “Sort By” section, choose “Size.” Then, at the bottom, tap “OK.”
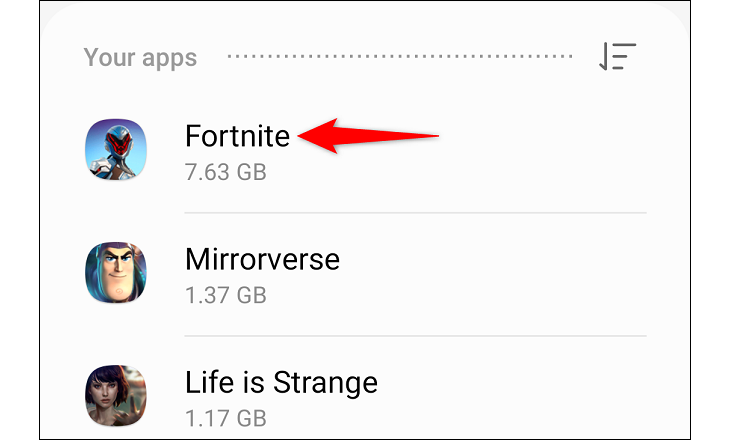
From the app list on your screen, select the app for which you want to clear the cache.
On the app’s page, scroll down a bit and select “Storage.”
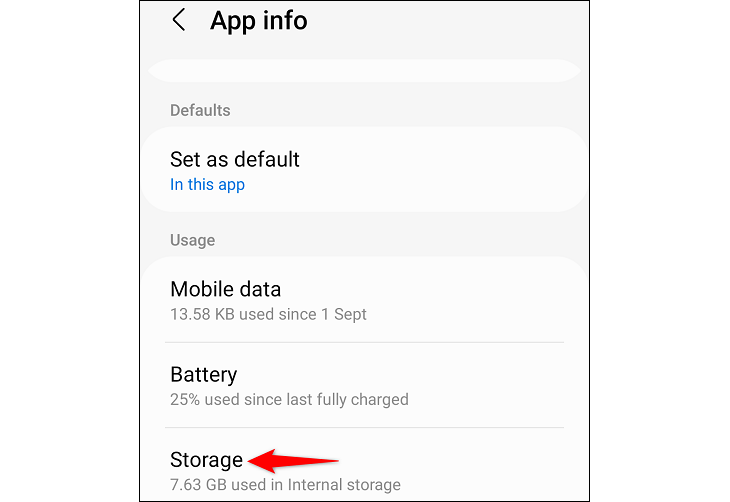
On the “Storage” screen, next to “Cache,” you’ll see the current cache size for your selected app. To clear the cache, in the bottom-right corner of your screen, tap “Clear Cache.”
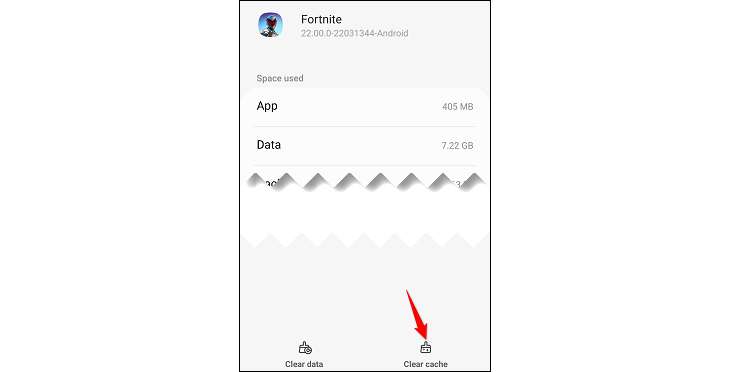
Your phone will clear the selected app’s cache without any prompts.
As you start using your apps, they’ll re-create the cache files to provide you with a better app experience. You don’t have to clear the cache every day, but it’s a good idea to do it every once in a while, especially when you’re experiencing app-related issues.
Related: How to Fix the “Screen Overlay Detected” Error on Android
How to Clear the Browser Cache on Android
Like other apps, your web browsers like Google Chrome, Mozilla Firefox, and Microsoft Edge store cached images and site files. These files help improve your browsing experience.
However, if you experience problems with your browser , it’s a good idea to clear your cache. Doing so only removes the cached images and other files; your site logins and other items remain intact.
Delete Chrome’s Cache
Start by launching Chrome on your Android phone. Then, in the browser’s top-right corner, tap the three dots and choose “Settings.”
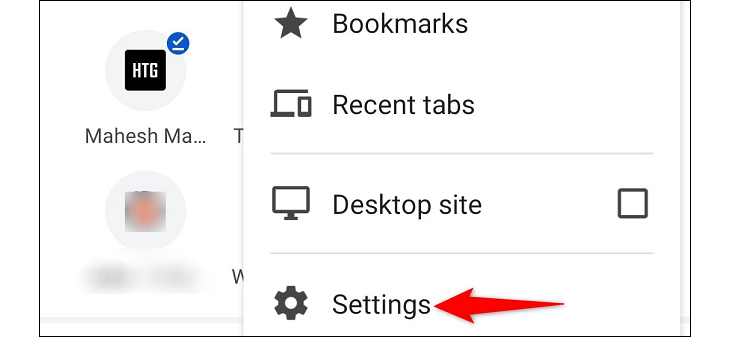
In “Settings,” select “Privacy and Security.”
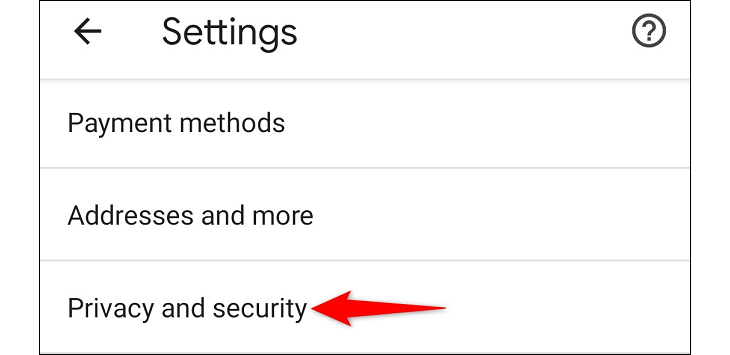
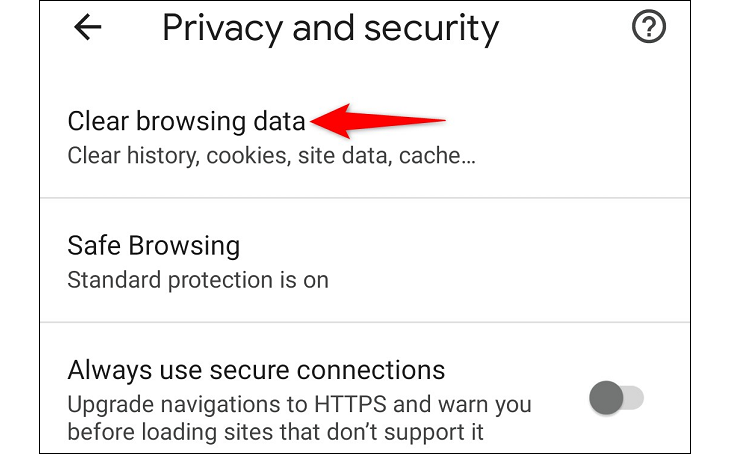
On the “Privacy and Security” page, choose “Clear Browsing Data.”
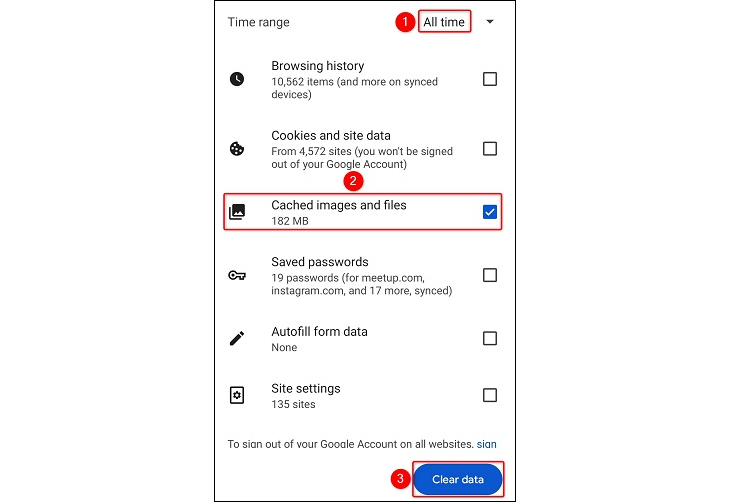
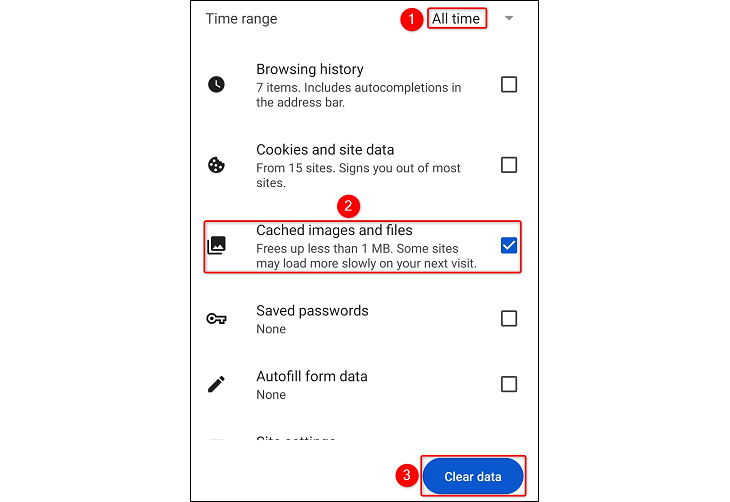
You can now select the items you want to clear from your browser. First, from the “Time Range” drop-down menu, choose the time range for which you want to clear the cache. Then, enable the “Cached Images and Files” option and choose “Clear Data.”
Your Chrome cache is now cleared.
Remove Firefox’s Cache
Launch Firefox on your Android phone. Then, in the top-right corner, tap the three dots and choose “Settings.”
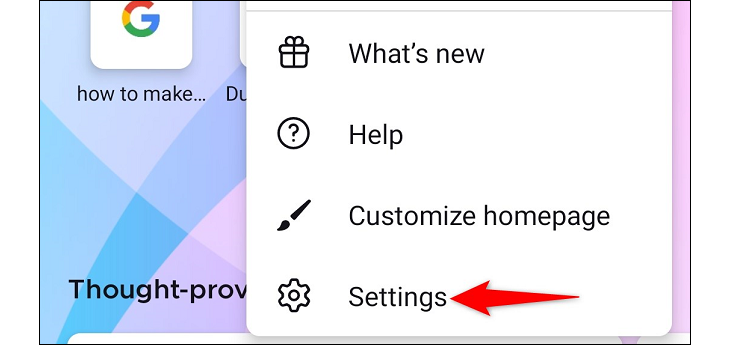
In “Settings,” scroll down and select “Delete Browsing Data.”
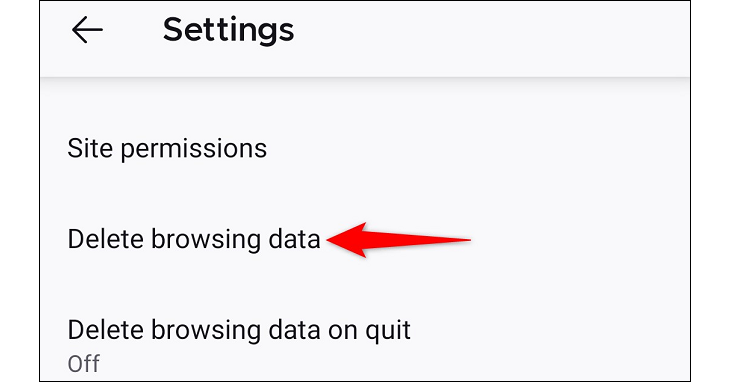
On the “Delete Browsing Data” page, enable the “Cached Images and Files” option. Then, tap “Delete Browsing Data.” Feel free to enable other options if you’d like to remove those items from your browser.
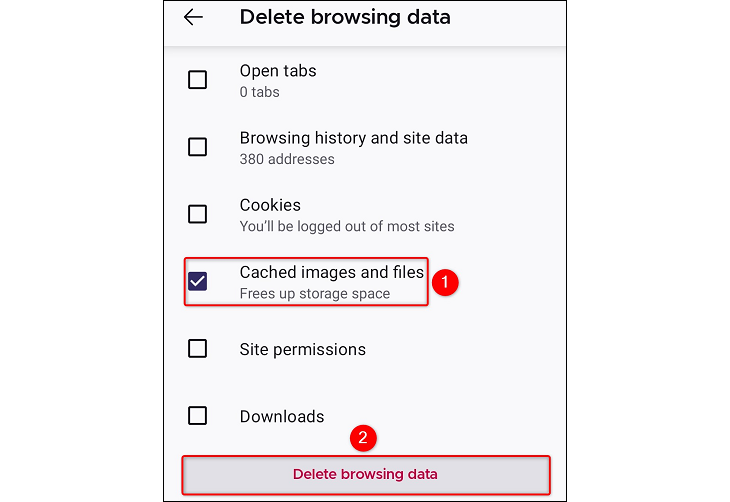
Select “Delete” in the prompt.

Firefox has now removed your cached images and files.
Clear Edge’s Cache
Open the Edge browser on your Android phone. Then, in the browser’s bottom bar, tap the three dots and select “Settings.”
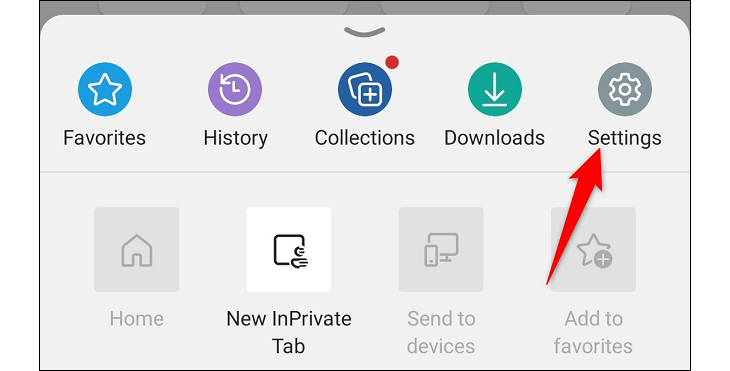
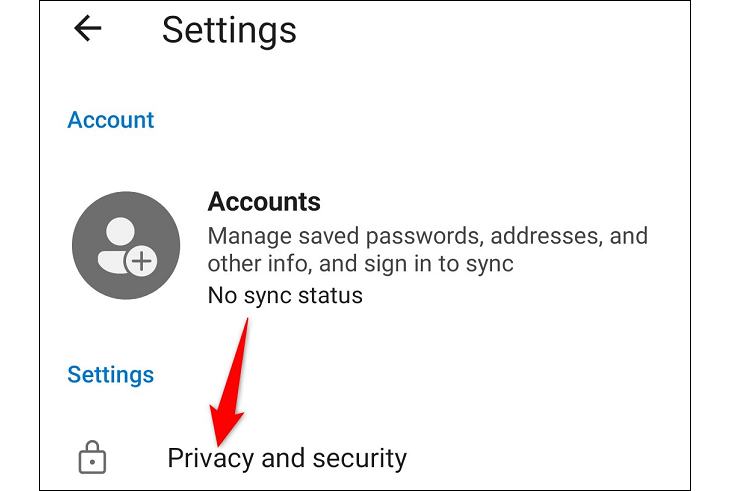
In “Settings,” choose “Privacy and Security.”
On the “Privacy and Security” page, select “Clear Browsing Data.”
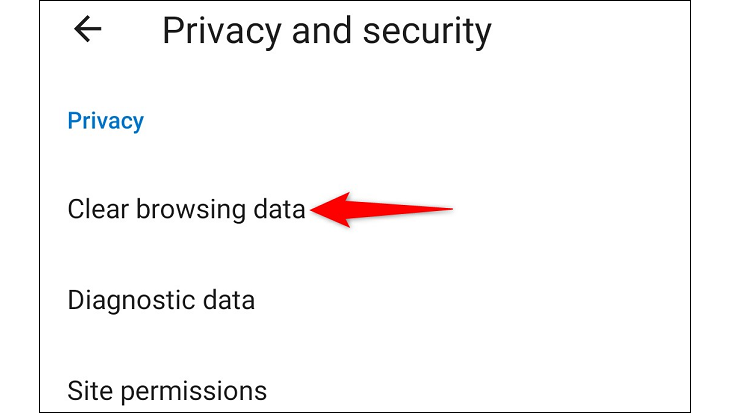
You’ll now see a list of items you can clear from the browser. Here, tap the “Time Range” drop-down menu and choose the range of time for which you want to clear your cache. Then, enable the “Cached Images and Files” option and tap “Clear Data.”
Edge will then delete your cached web content.
With cache files now gone from your Android phone, you’ll have a bit more storage space on your phone. You may even find that your app issues are gone.
Also read:
- [New] Infiltrate Live Tips for Guesting on TikTok Sessions for 2024
- [Updated] Joyful Journeys Await Best Classic Summer Movies for 2024
- 2024 Approved Spectrum Perfection Color Grading Basics
- 2024 Approved Vimeo Overview The World of Independent Film Hosting
- Alter Package Suitability
- Digital Sculpting for Designers Adobe Illustrator Edition
- In 2024, 5 Techniques to Transfer Data from Samsung Galaxy Z Flip 5 to iPhone 15/14/13/12 | Dr.fone
- In-Depth Guide: Installing, Initializing, and Using The Revo Uninstaller Application Efficiently
- The Future of Interactive Media: How Google's New Pixel Tablet Transforms Into an Advanced Smart Display
- Top 10 Awesome Mobile Gaming Experiences Without Internet
- Unravel the Mysteries of MorphVOX The Ultimate Guide to Voice Modification
- Unraveling the Origin: What's Behind the Name 'Bluetooth'?
- Wake Up Gently with Philips Hue - Transform Your Mornings Into Breathtaking Sunrises by Your Bedside
- Wi-Fi Standard 8 (Wi-Fi 7): Advantages Explained & Why You Should Consider Switching!
- Your Smart TV's Secret: Beyond Entertainment, It Monitors All You Do
- Title: Step-by-Step Guide: How To Empty Your Android Device's Cache
- Author: Kevin
- Created at : 2024-09-13 16:00:59
- Updated at : 2024-09-16 16:39:36
- Link: https://hardware-reviews.techidaily.com/step-by-step-guide-how-to-empty-your-android-devices-cache/
- License: This work is licensed under CC BY-NC-SA 4.0.
