
Creating Your Own DIY Bluetooth-Enabled Smart Speaker with Raspberry Pi
Creating Your Own DIY Bluetooth-Enabled Smart Speaker with Raspberry Pi
Key Takeaways
- Set up Balena Sound on Raspberry Pi for a versatile Bluetooth speaker.
- Configure audio settings for optimal performance using commands in Balena Cloud.
- Stream music via Bluetooth, Spotify Connect, and AirPlay for a seamless listening experience.
I transformed a Raspberry Pi into a powerful Bluetooth smart speaker that can stream music from my phone, tablet, or computer. It uses BalenaSound and turns my Raspberry Pi into a smart speaker that supports a wide range of services, including Spotify, Apple AirPlay, and Bluetooth—and more.
Download and Install Balena Sound on Your Raspberry Pi
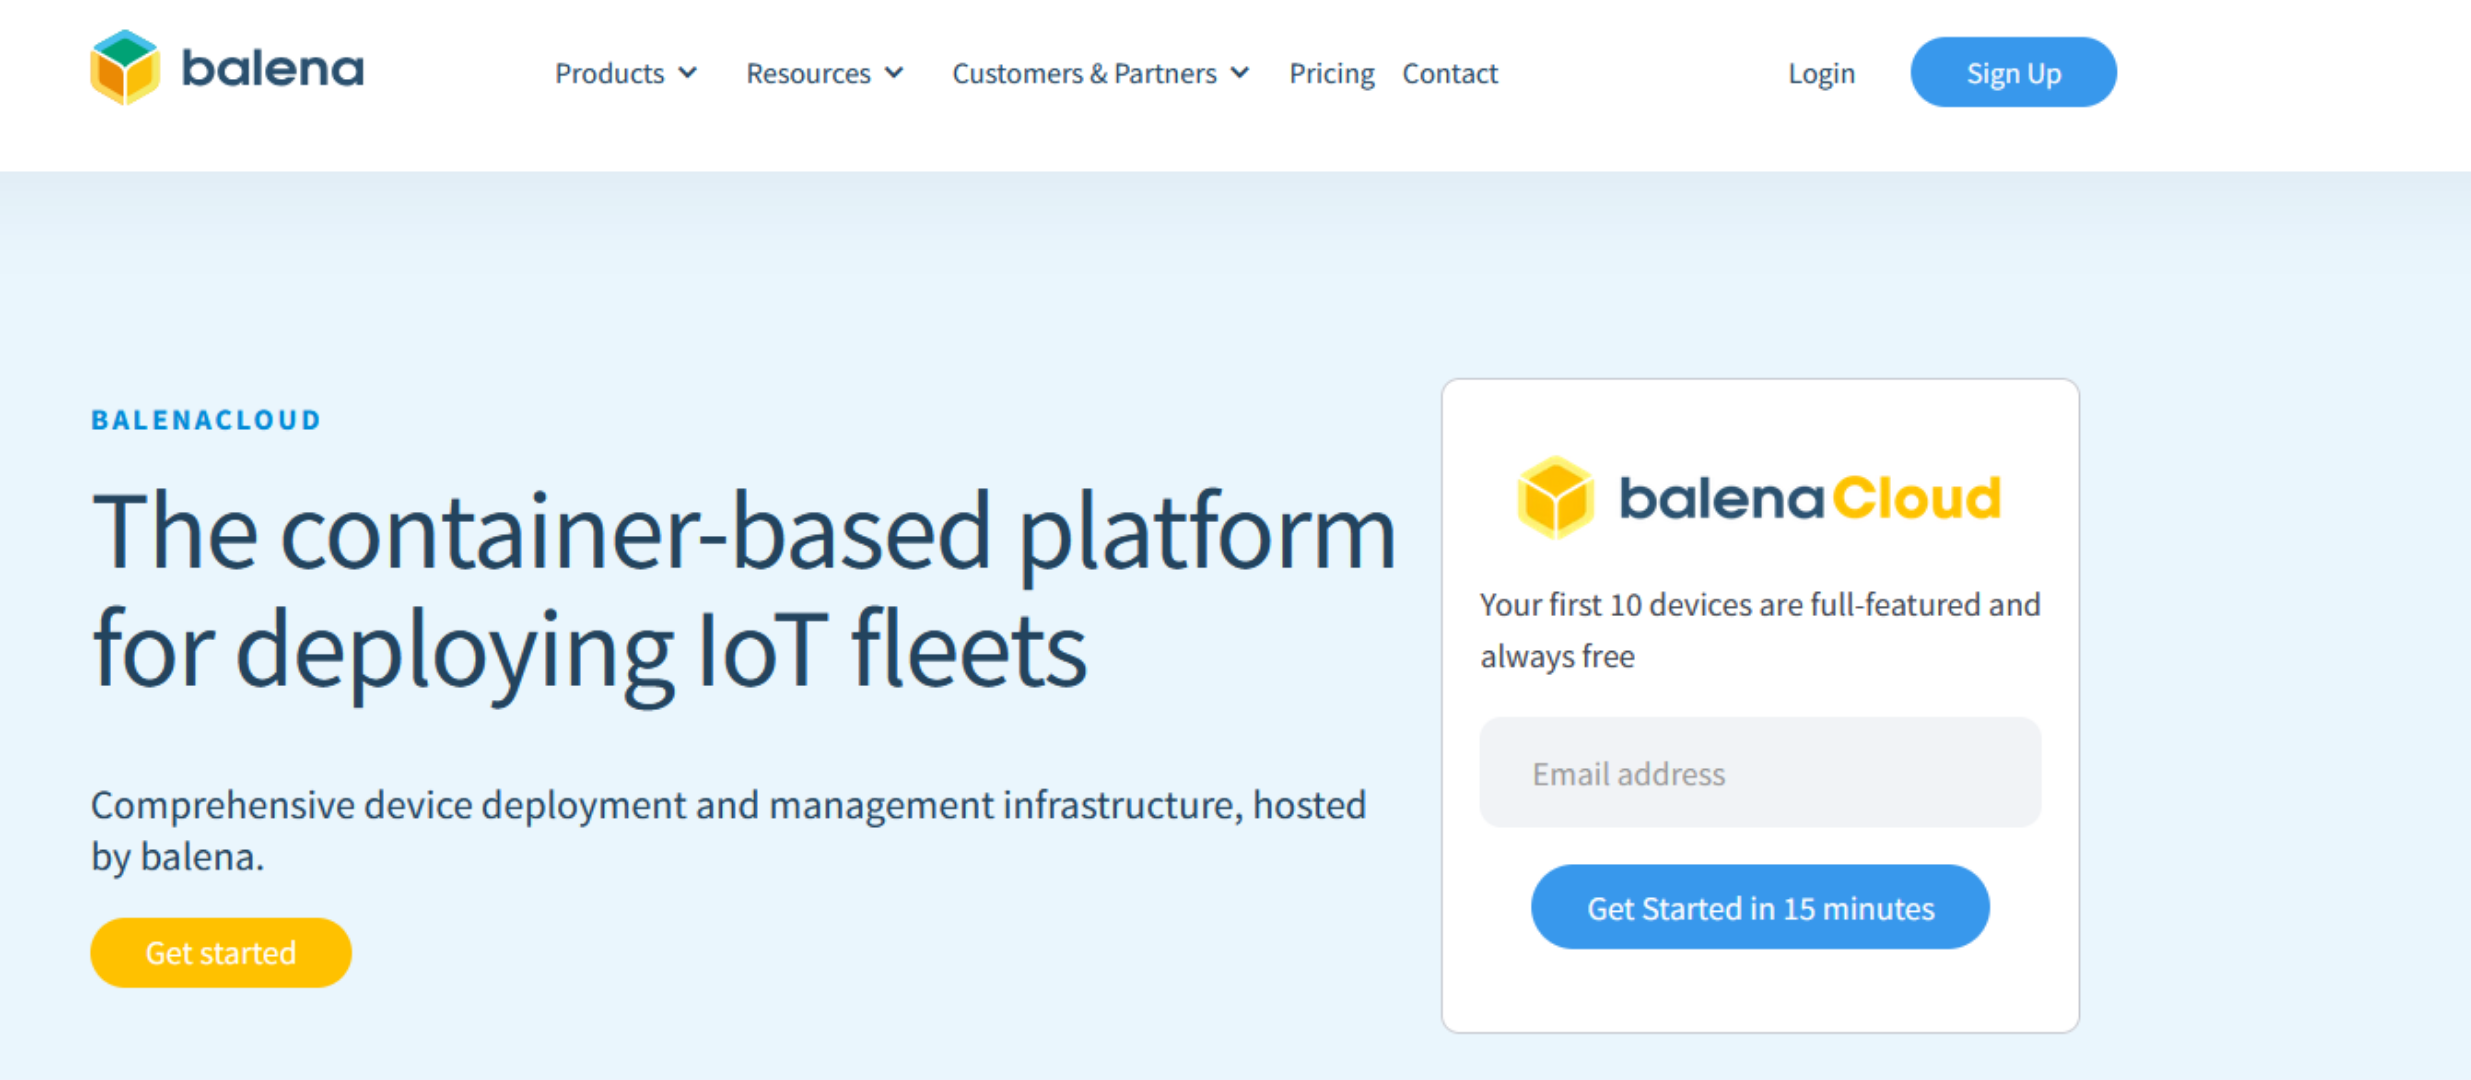
To get started with your Smart Speaker, you need to set up a BalenaCloud account. Head over to their website, and create an account. Find the “Sign Up” button, and select it to start the sign-up process. You can sign up with an email account, GitHub, or Google.
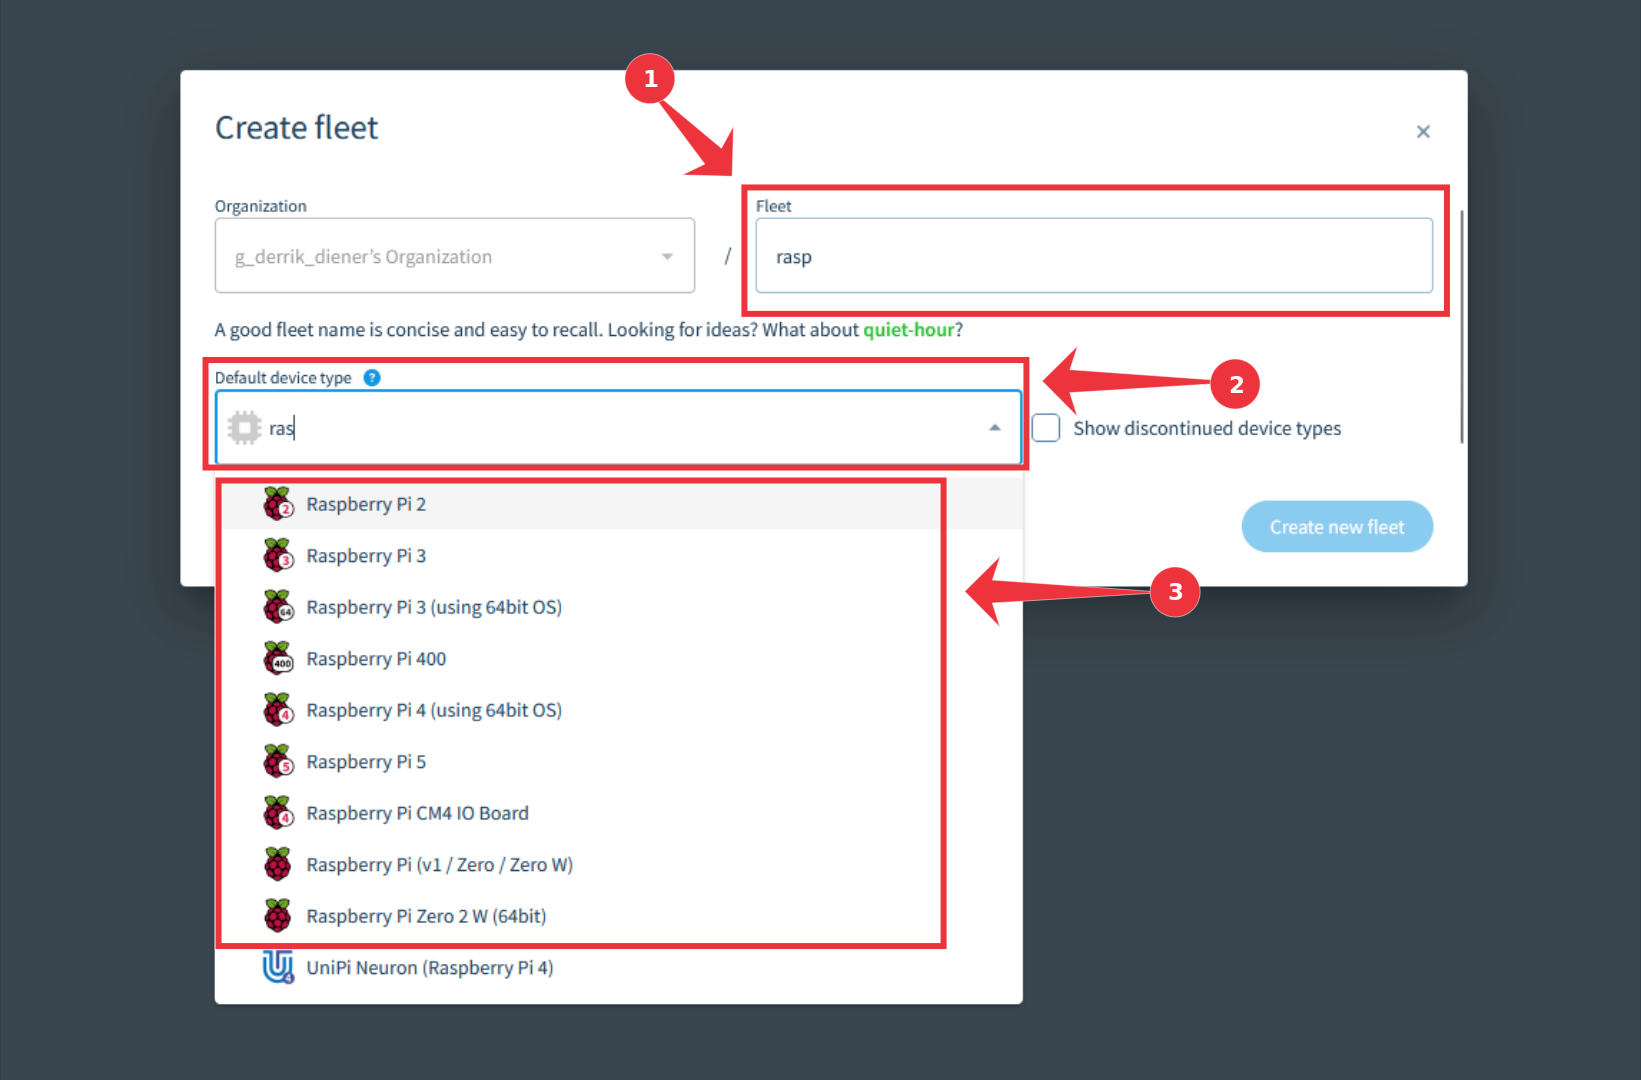
Once you’ve created a BalenaCloud account, it will load up their dashboard. From here, find the “Create a new fleet” button to start setting up your Raspberry Pi device. Creating a “fleet” allows you to monitor your Raspberry Pi device remotely through the Balena interface.
When you’ve created your fleet, Balena Cloud will take you to the fleet dashboard page. Here you can see an overview of how many devices are in your fleet, device types, application settings, etc. Take a look at the dashboard and familiarize yourself with it.
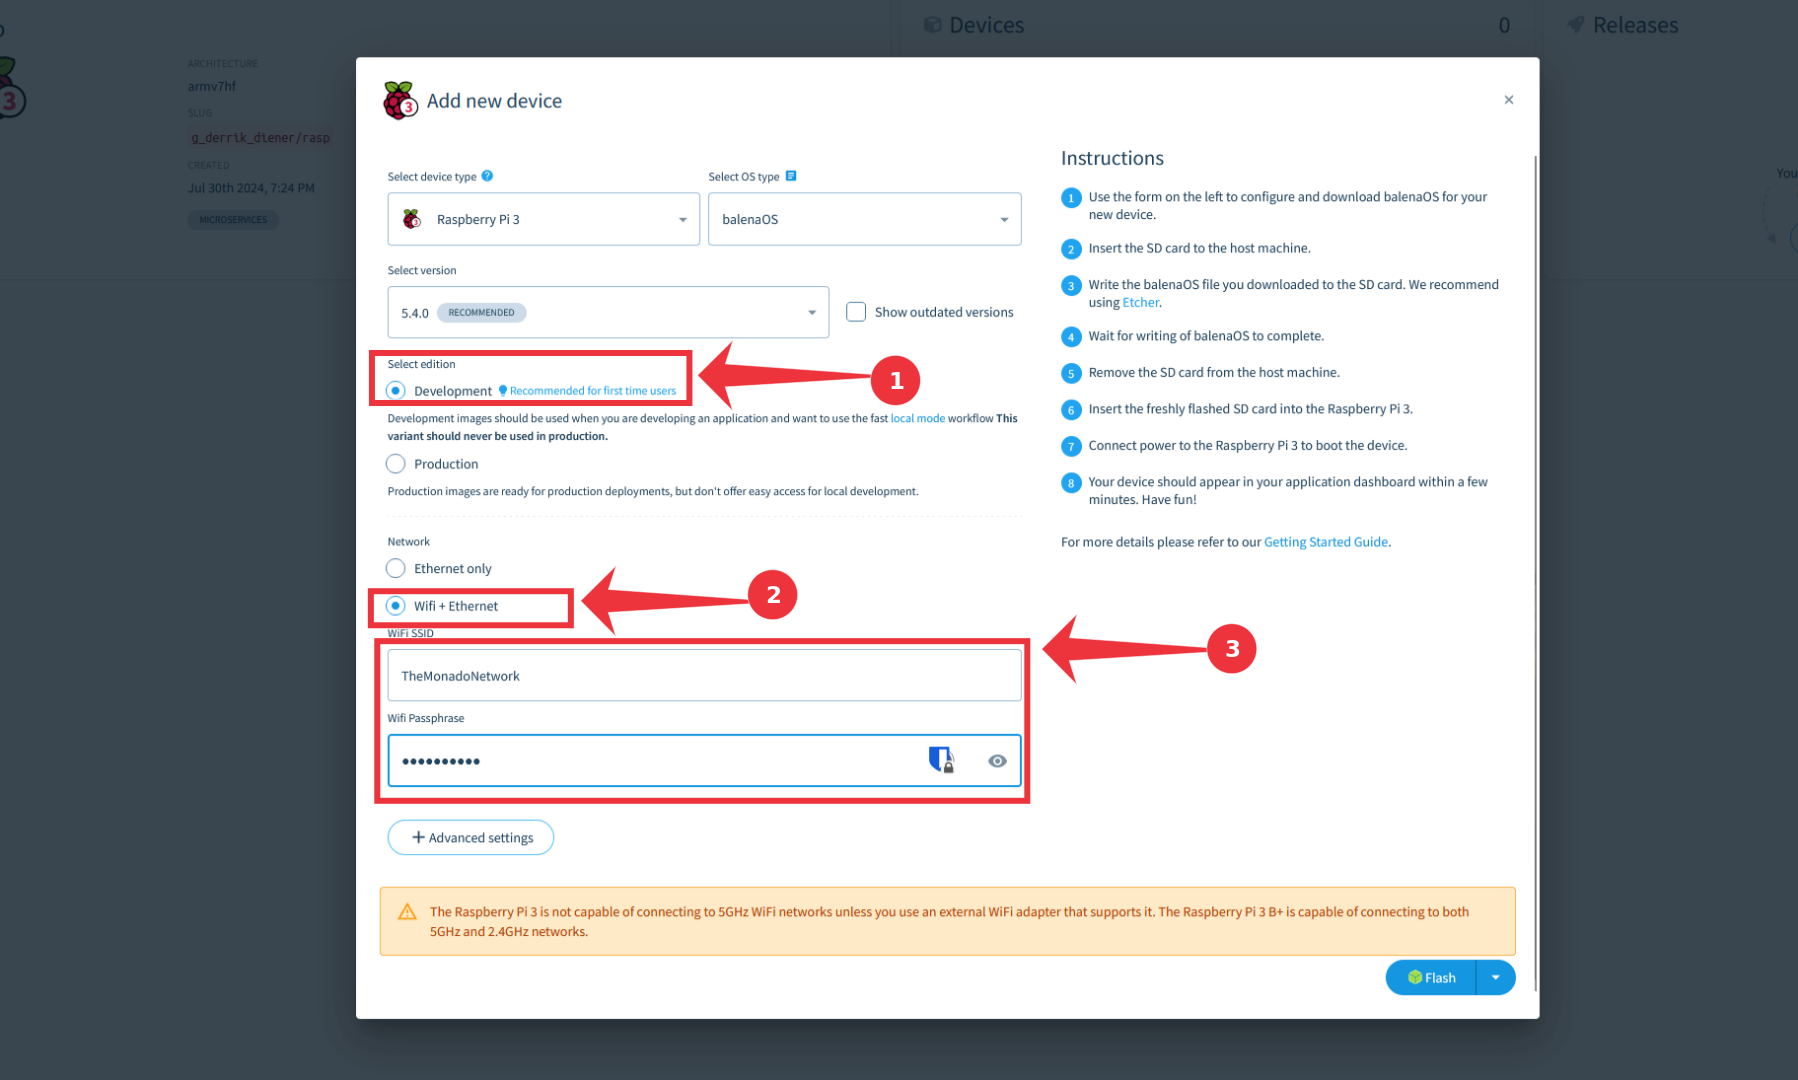
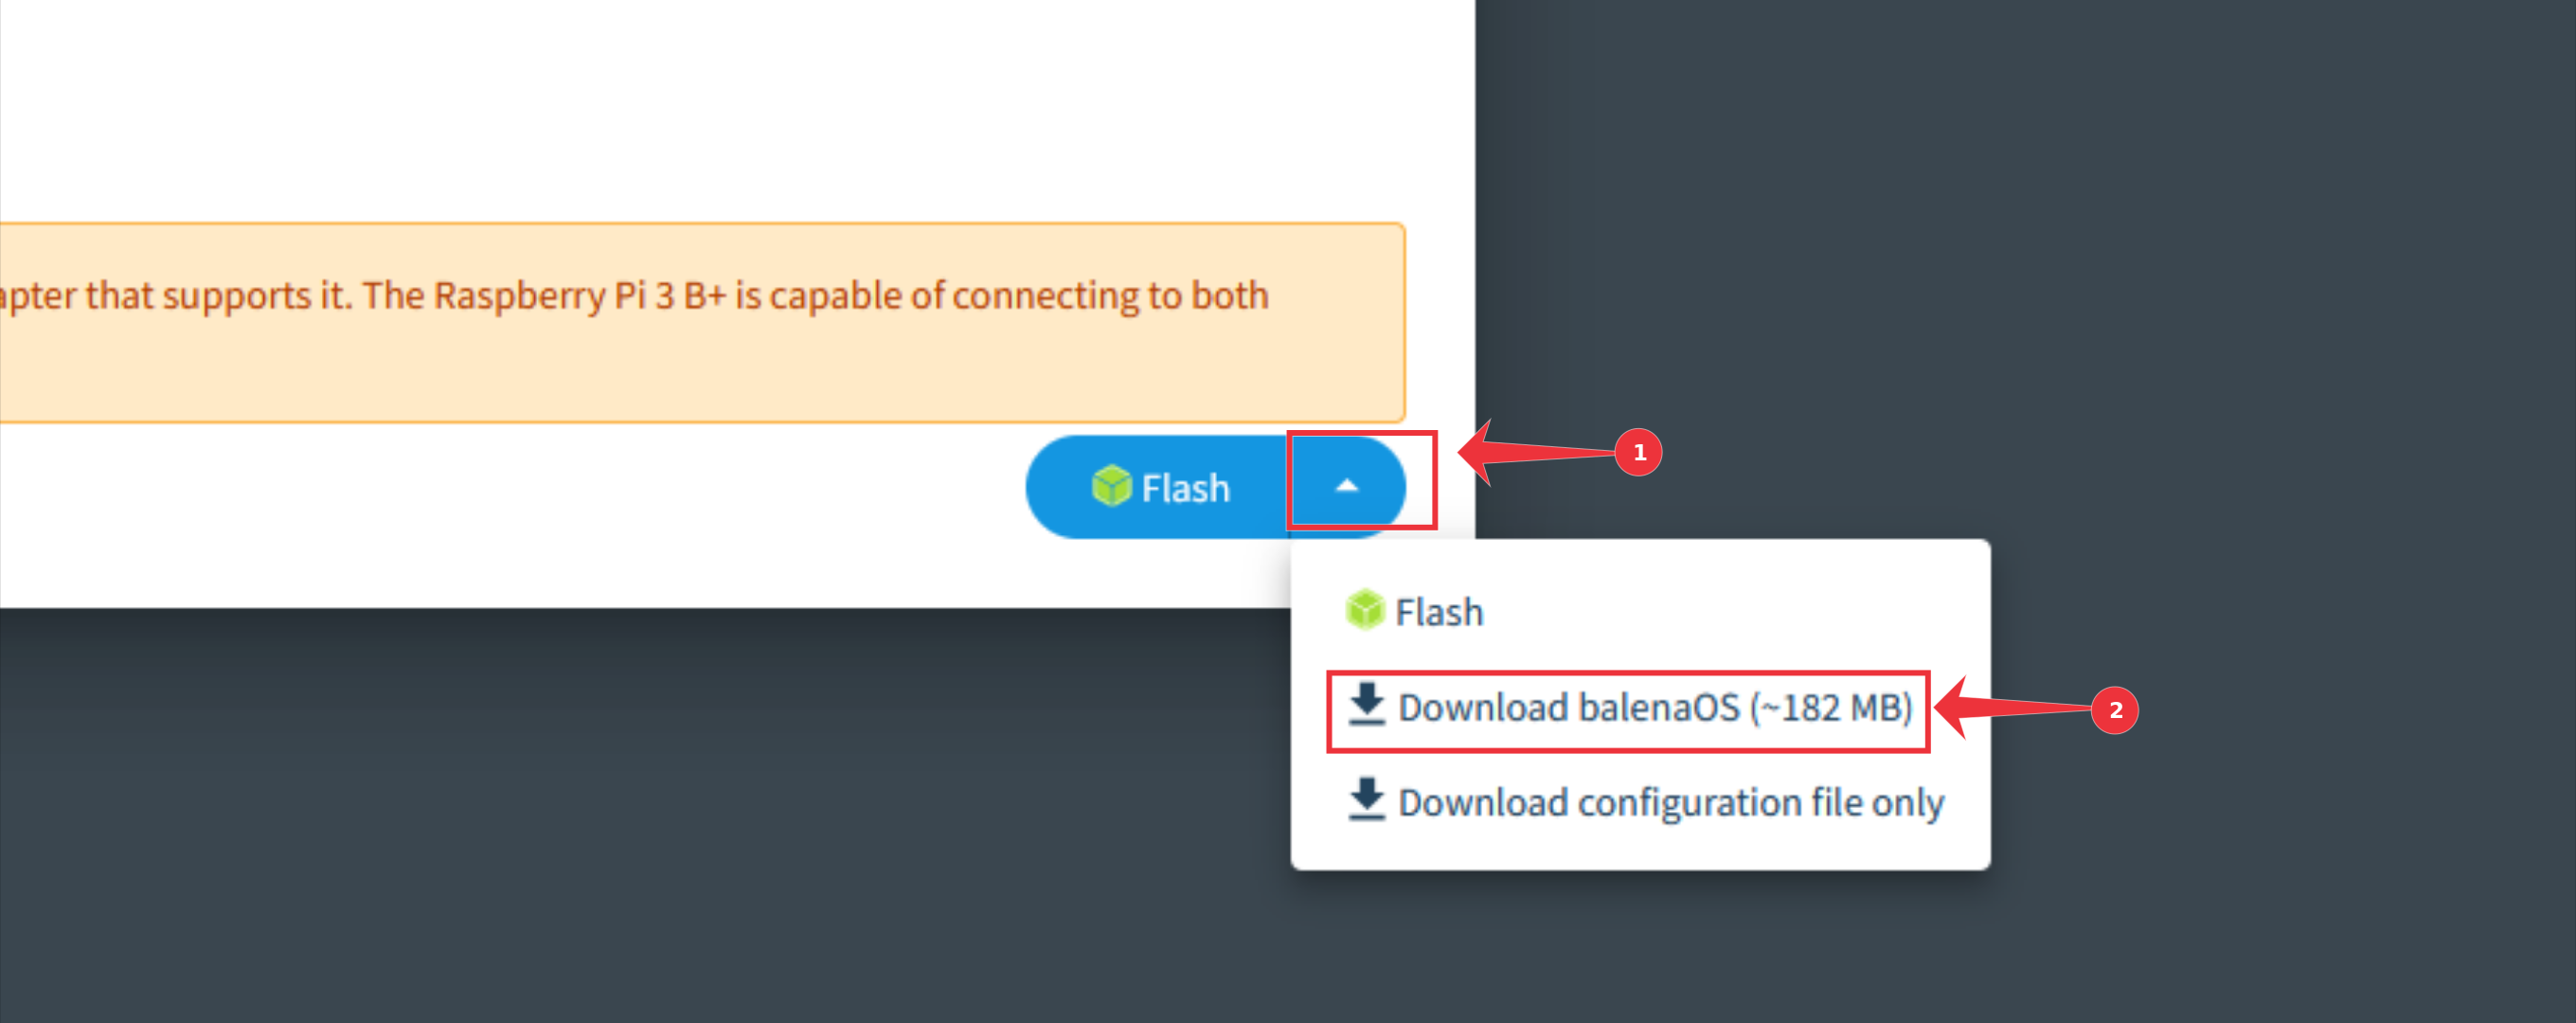
Now that you’re familiar with the fleet dashboard, find the “Add device” button, and select it. Once you’ve selected the “Add device” button, do the following. First, select “Development”. Then, find “Network”, select “Wi-Fi + Ethernet”, and enter your WiFi network name and password. When everything is configured, click the arrow button next to “Flash,” and select “Download balenaOS”.
With your customized balenaOS downloaded, download the Balena Etcher tool to your computer and install it. Then, do the following to install your image on the Raspberry Pi.
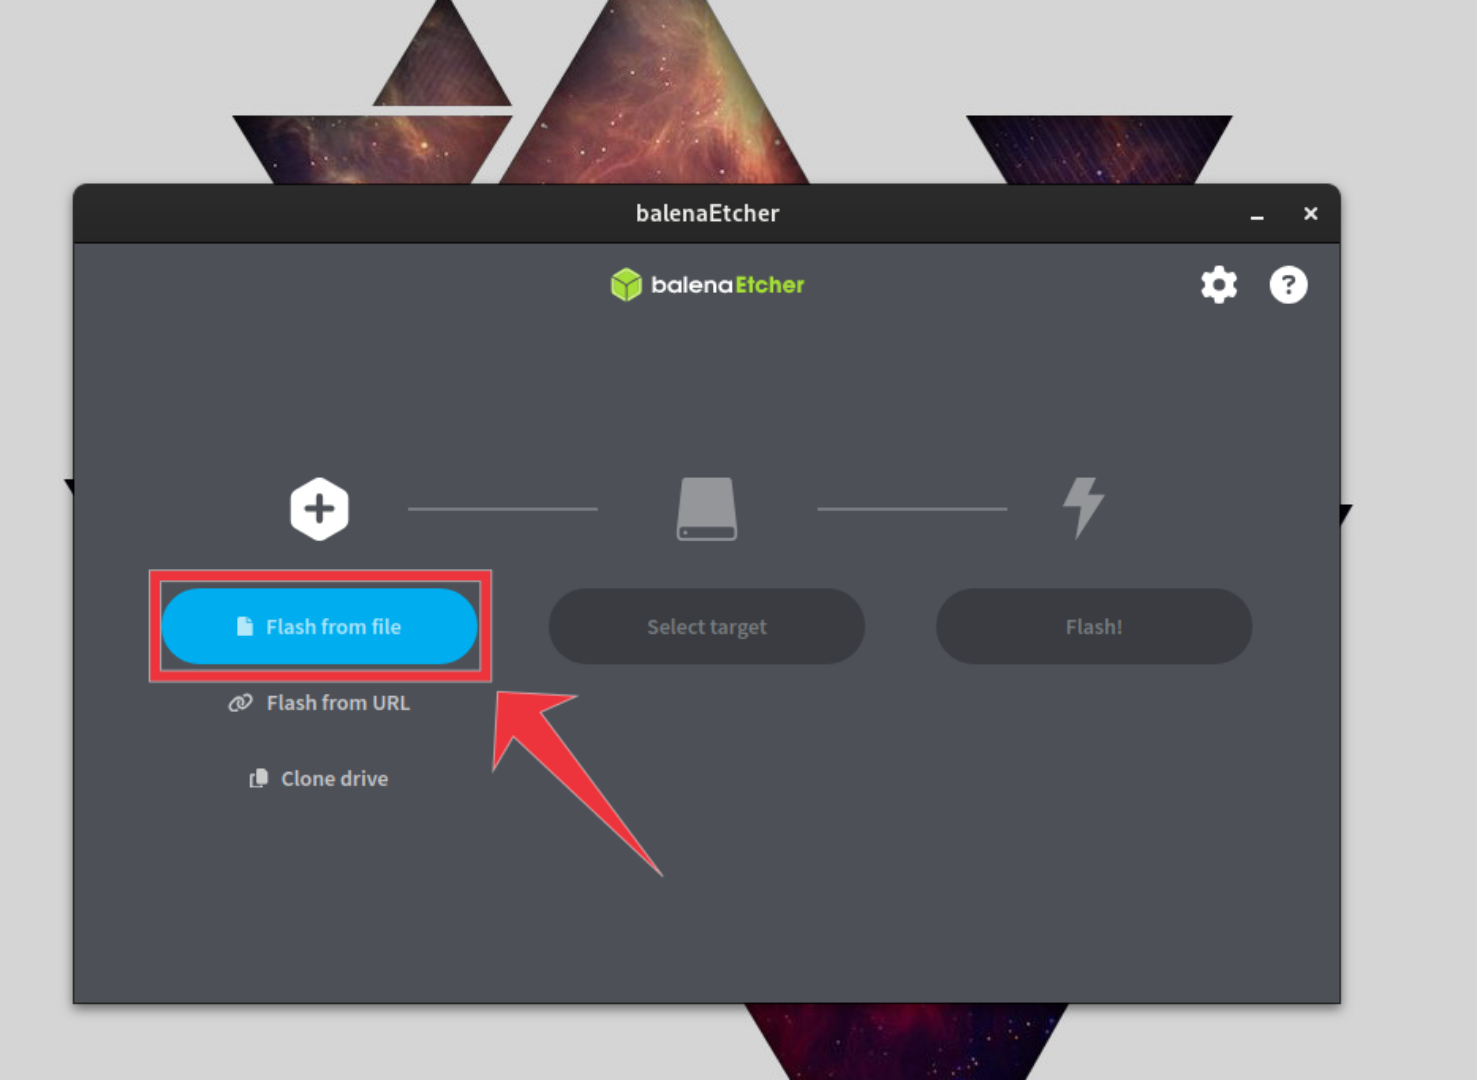
Find the “Flash from file” button and select it with the mouse. From here, browse for the balenaOS file on your computer that you downloaded from your Balena Cloud fleet.
Find the “Select target” button and select it. Insert your Raspberry Pi SD card into your computer, and select it in the “Select target” menu.

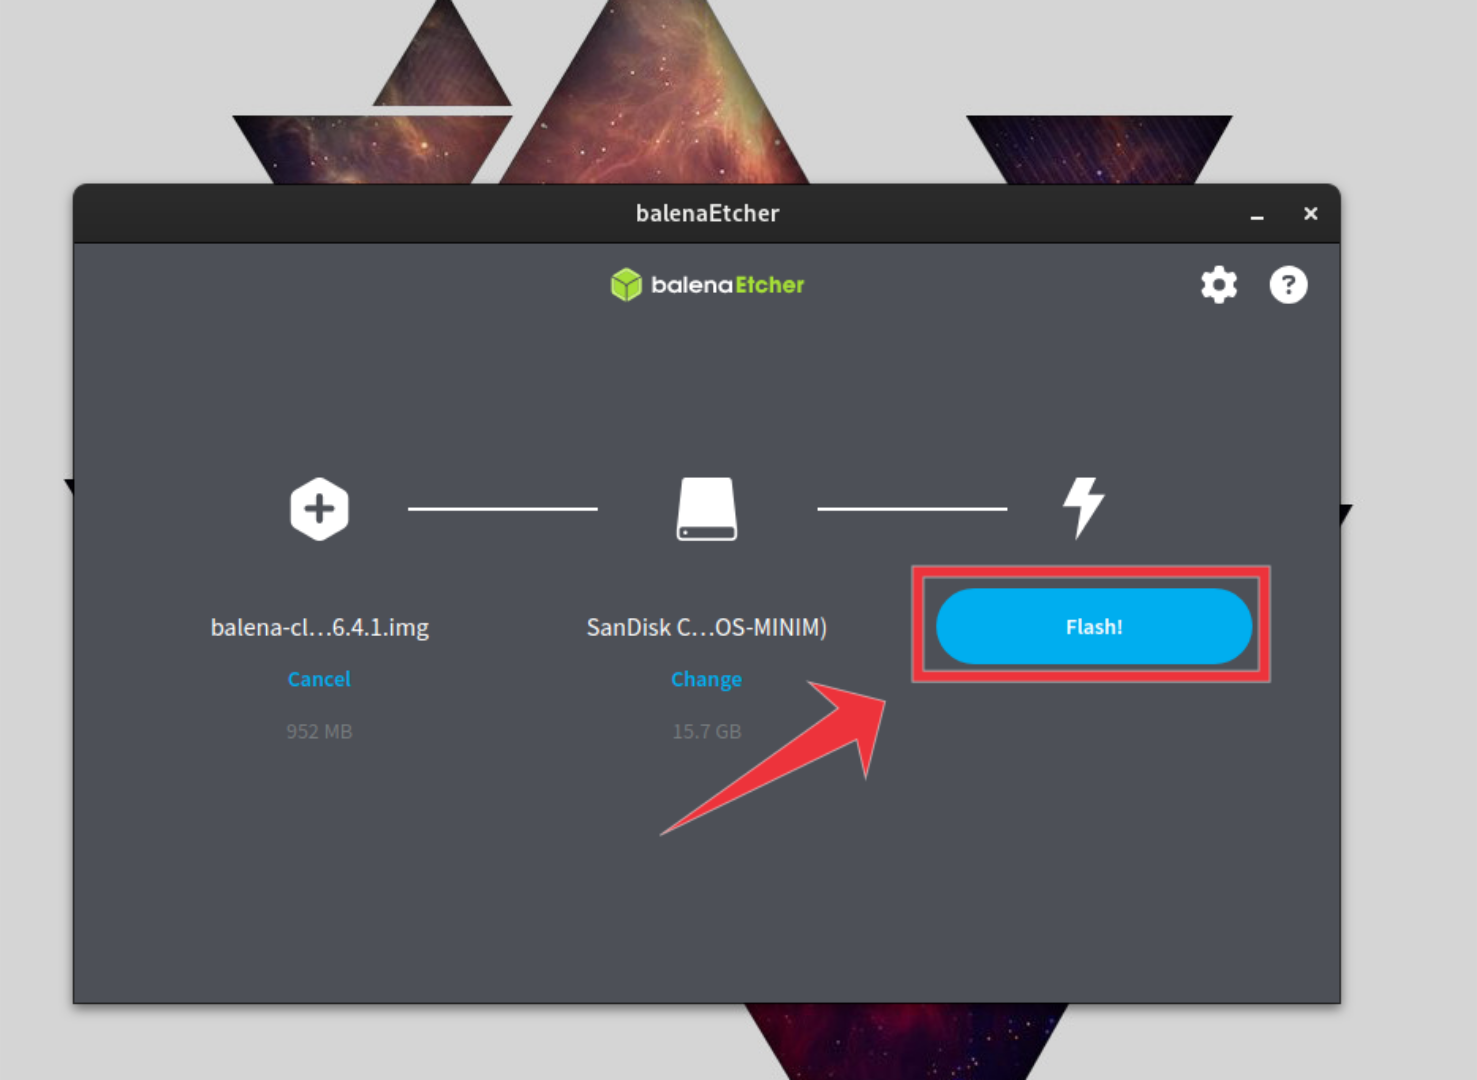
Find the “Flash!” button and select it to begin the flashing process. When the process is complete, eject your SD card and insert it into your Raspberry Pi.
Connect and Power Up Your Raspberry Pi
After inserting your SD card into the Pi, plug in the power supply, and turn it on. You should also plug in an HDMI cable to the Pi and your audio system (if it supports HDMI). Alternatively, if your audio system does not support HDMI, plug it in via the Pi’s analog audio port.
Once your Pi is powered on, return to the Balena Cloud dashboard, and wait for it to appear online in your fleet. Once it is online, access the devices in your fleet, and select your Pi. Next, load up the BalenaSound page on the web, and click the “Deploy” button.
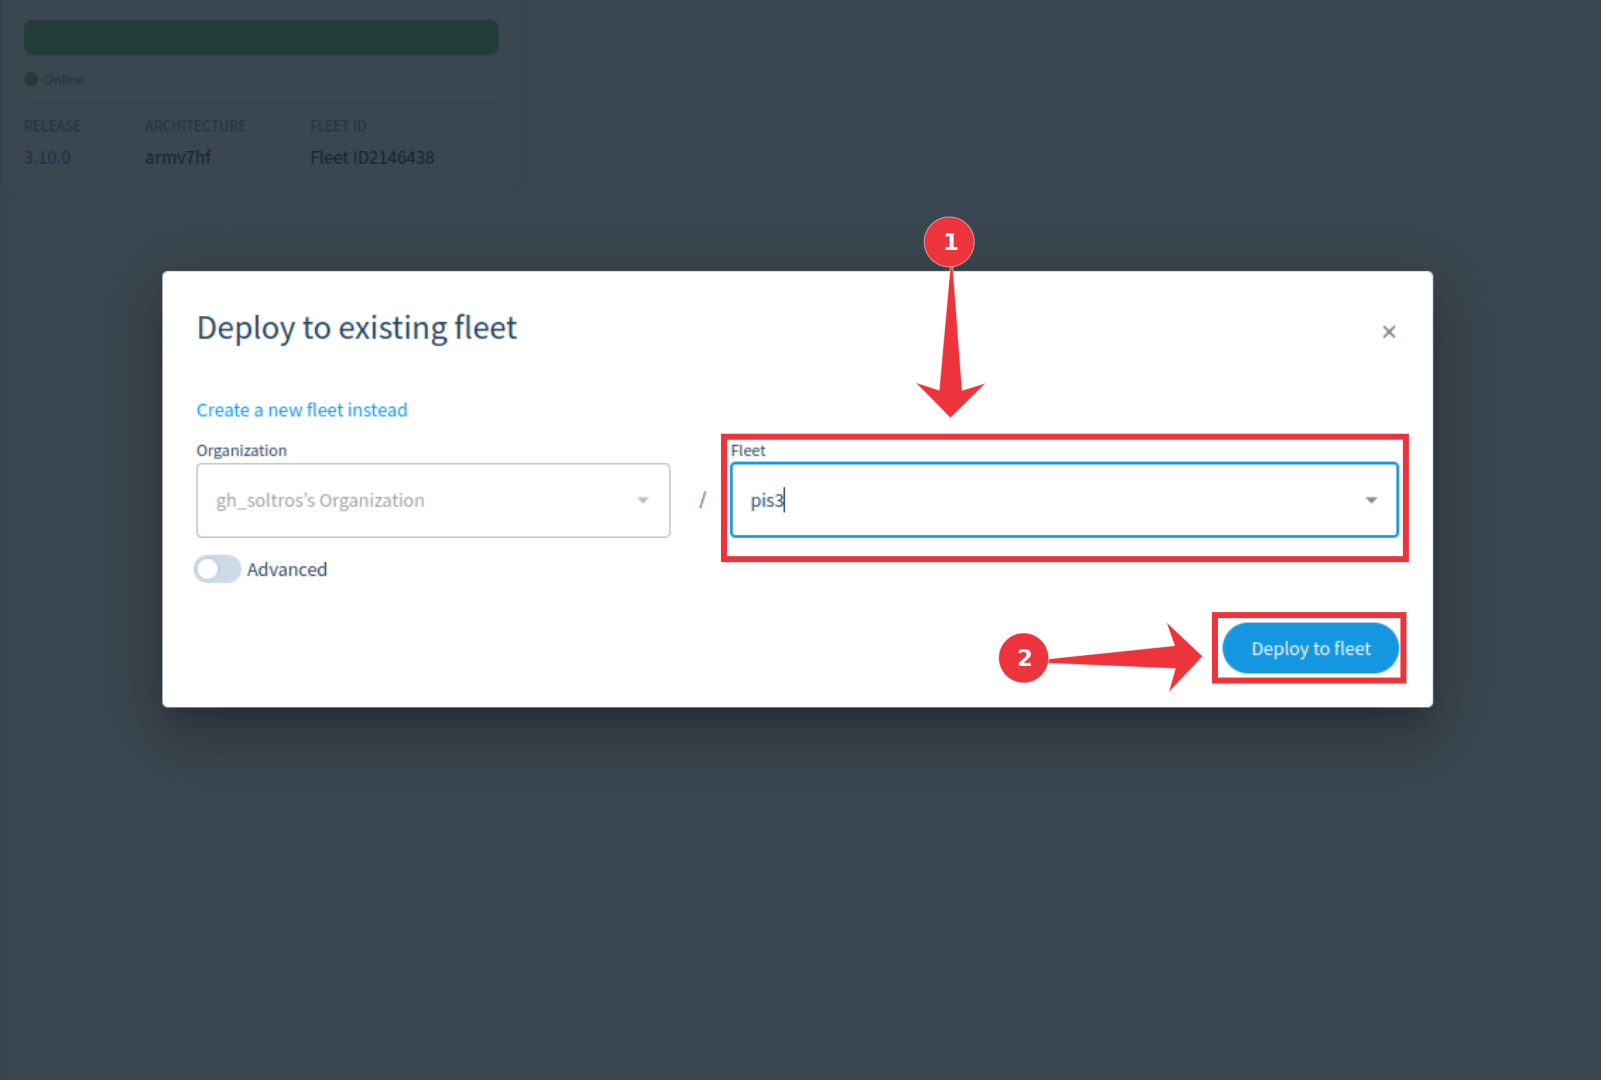
When you select the “Deploy” button, it’ll open up a “Create and deploy to fleet” window. Find the “Use an existing fleet instead” button, and select it with the mouse. Select the fleet your Raspberry Pi is on, followed by “Deploy to fleet.”
Selecting the “Deploy to fleet” button will download and install BalenaSound on your Pi. This process will take a bit of time, but once it is finished, it can accept connections via Spotify Connect, Bluetooth, Apple Airplay, and many other features.
Configure Balena Sound Settings for Optimal Audio Performance
Your Raspberry Pi’s sound settings need to be configured to handle BalenaSound correctly. To start, access your device in Balena Cloud. Then, find “Terminal” and click “Select a target.” Set the target to “audio,” and select the “Start terminal session” button. Once connected, you’ll be able to send commands to your Raspberry Pi sound system.
To start, you’ll want to set the Raspberry Pi’s sound to 100%. If you don’t, everything will be too quiet. To do this, run the following command:
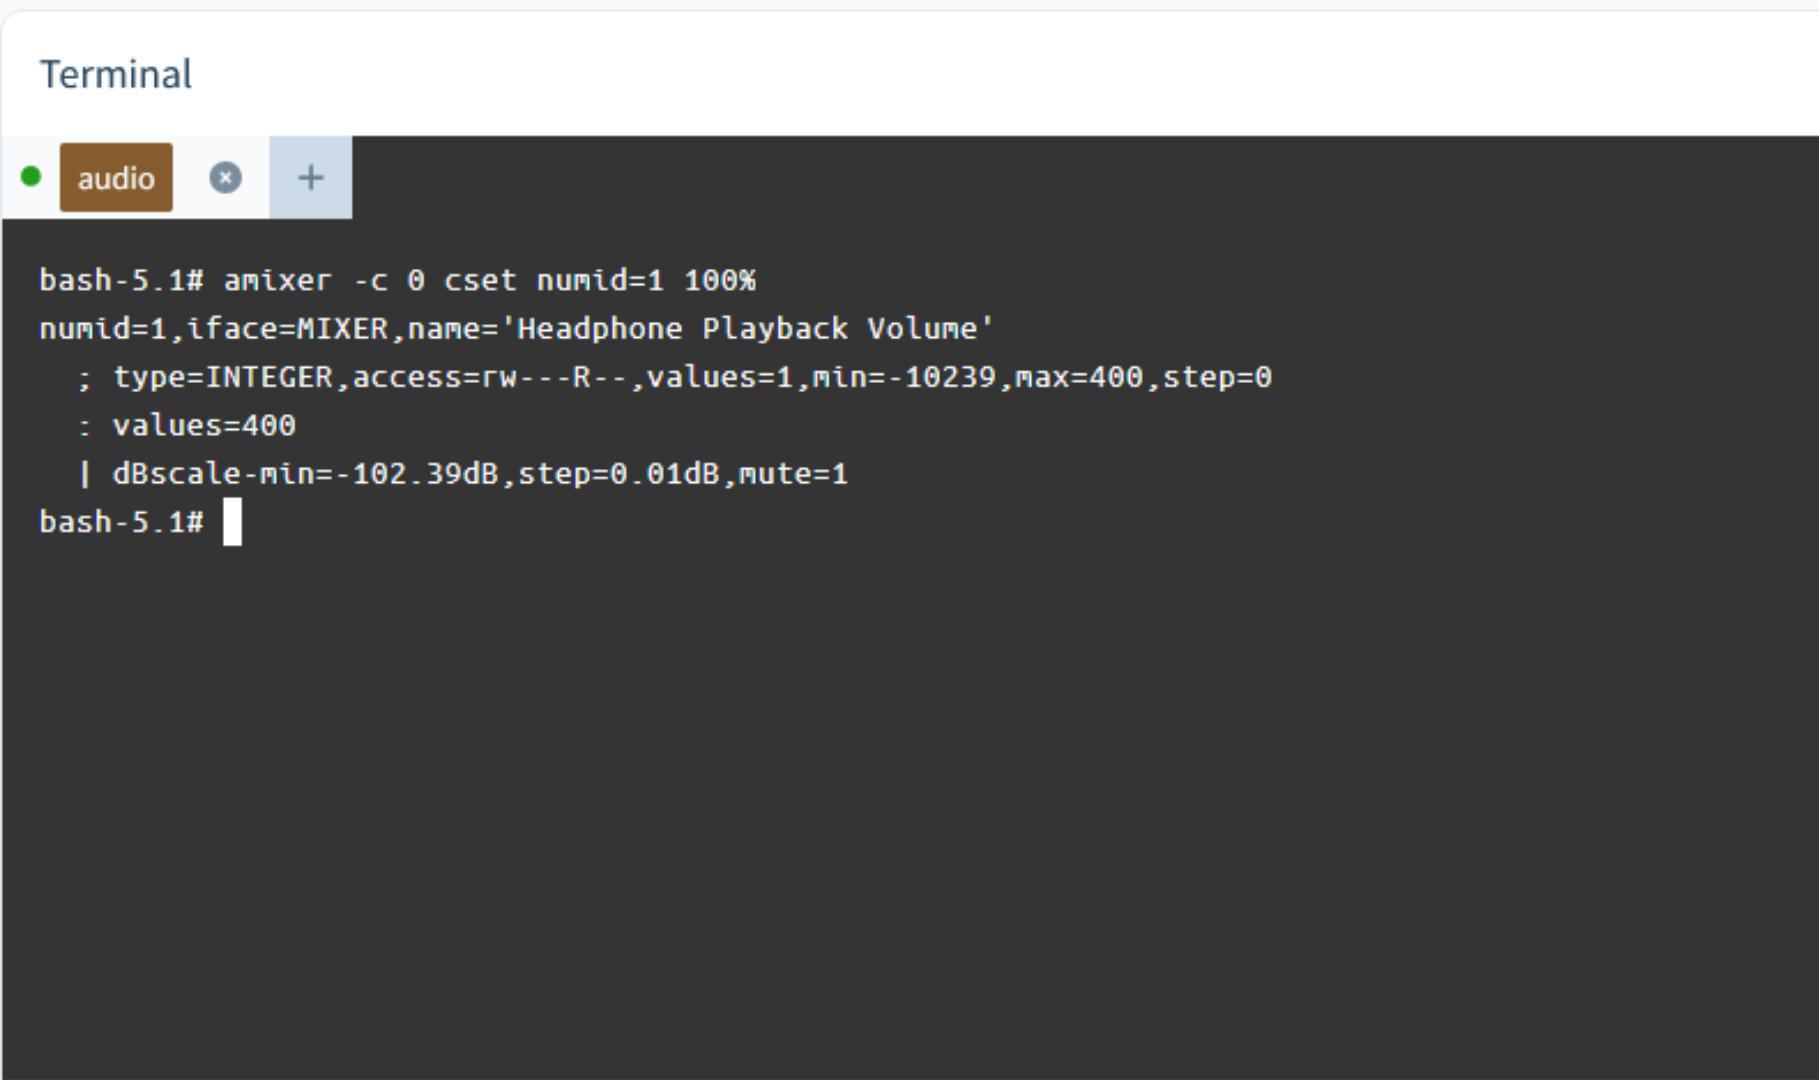
`amixer -c 0 cset numid=1 100%`
Alternatively, if you plan to use HDMI as the primary audio output, you’ll need to plug in an HDMI cable (to the Pi and the HDMI speaker system), and then set it to default:
`amixer cset numid=3 2
amixer -c 0 cset numid=3 100%`
Once you’ve configured your audio settings, you can close the terminal in BalenaCloud.
Stream Audio on your Raspberry Pi with BalenaSound
Streaming audio to your Raspberry Pi running BalenaSound is incredibly easy. To use your Pi as a Bluetooth speaker, simply open the Bluetooth settings on your phone, tablet, or PC and connect to the device labeled “balenaOS”. Once connected, it will work just like any other Bluetooth speaker you’ve used before.

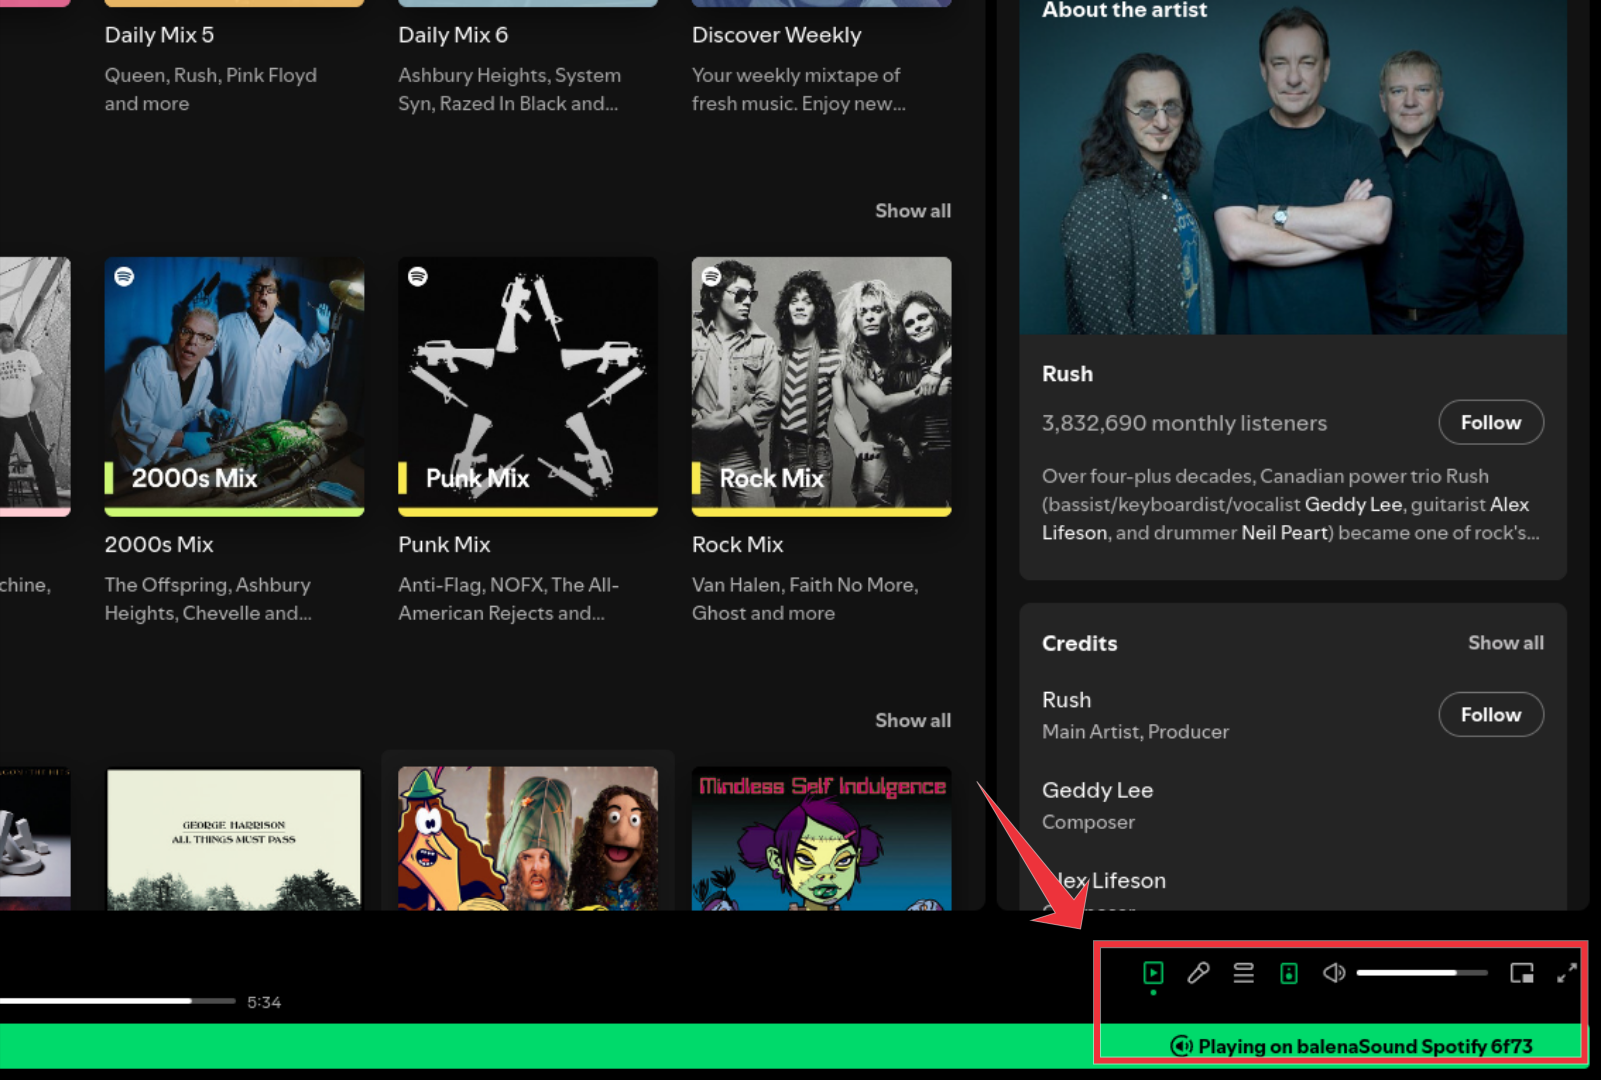
Want to stream music via Spotify ? Open the Spotify app on your device (phone, tablet, or PC), select the device menu, and use Spotify Connect to broadcast your songs to your Raspberry Pi. Additionally, BalenaSound transforms your Raspberry Pi into an AirPlay device, allowing you to select it as a streaming destination on Apple Music or other AirPlay-supported apps on iOS.
Troubleshooting and Optimizing Your Balena Sound Setup
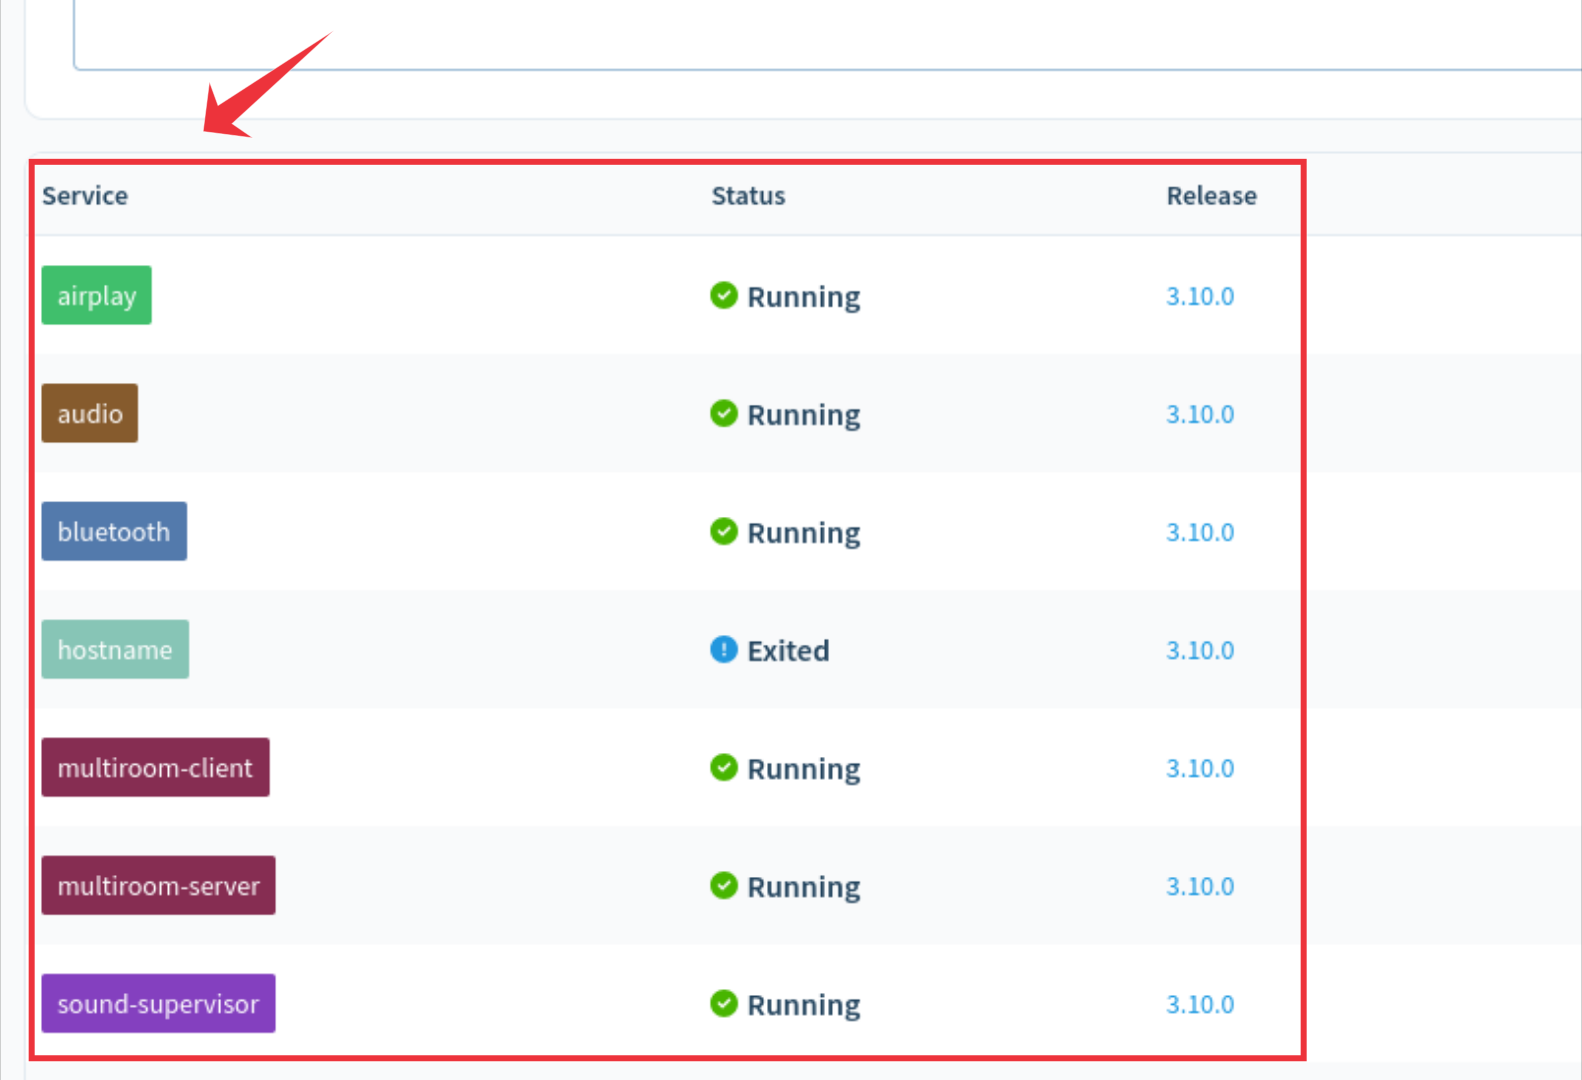
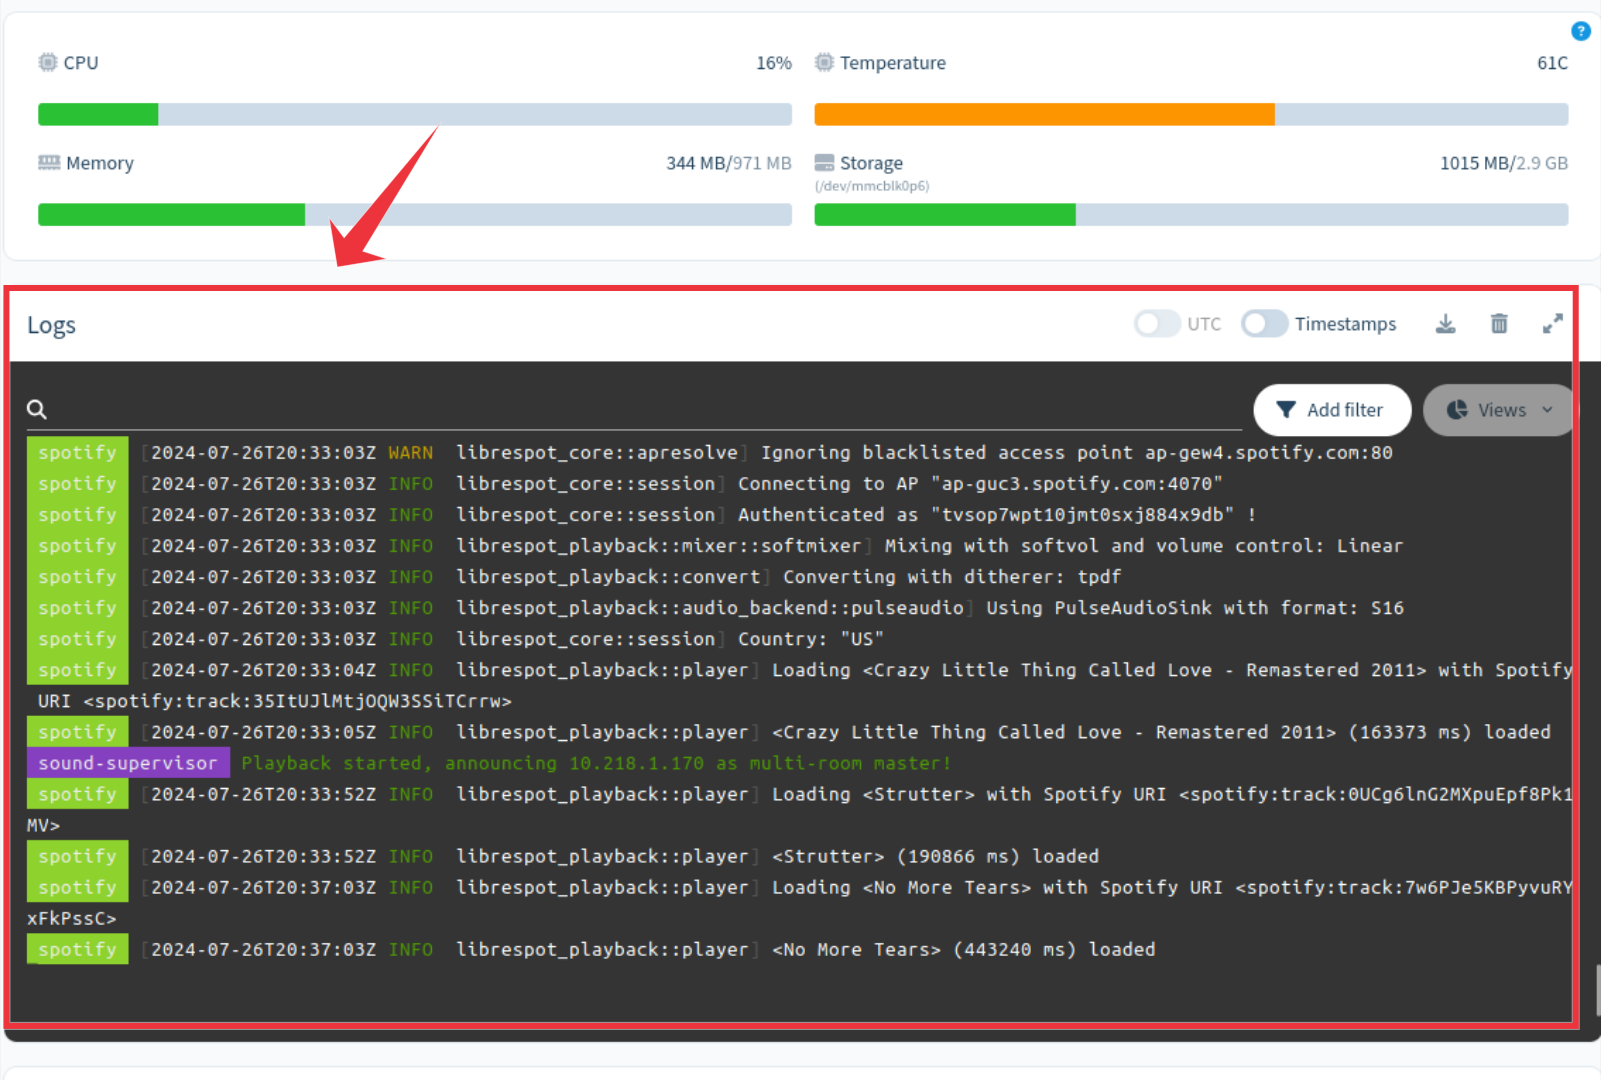
Now that you’ve set up BalenaSound on your Raspberry Pi and turned it into a Bluetooth speaker, it’s time to fine-tune it for optimal performance. If you run into any issues or want to get the best possible sound quality, don’t worry - troubleshooting isn’t as hard as it seems. Start with the basics: ensure your Raspberry Pi is properly connected to your speaker, and that the volume is turned up and not muted. Be sure to also take a look at the command output for each of the services on the Balena Cloud dashboard. For example, below we see the Spotify service output, and it shows that it is working correctly.
If you run into more complicated issues or want to take your setup to the next level, consider checking out the BalenaSound settings and exploring the options available. You can adjust buffer sizes, latency settings, and more to meet your needs. Don’t be afraid to experiment and try out different configurations. If you get stuck, the issues page on GitHub is always a good place to check.
What are you waiting for? Dive in, and take your Bluetooth speaker to the next level. With a little tweaking and experimenting, you’ll be enjoying your favorite tunes over Bluetooth, Spotify Connect, and AirPlay. Happy listening!
Also read:
- [New] Full Disclosure Inside DJI's Next Gen Drone - Inspire 2 for 2024
- [Updated] In 2024, Discovering and Dominating Unique Segments in YouTube
- [Updated] Stream Like a Pro FB Live Tips 2023
- Discover the Leading Handheld Game Devices 'S Gamers
- Discover the Perfect Workout Partner: Samsung Galaxy Fit2's Advanced Fitness Tracking Technology
- Fixing the Issue: Preventing Spotify From Closing on iOS Upon Screen Lock
- Rising Cost of Hard Drives? Discover Affordable Options and Secrets
- Samsung Discovery Sale: Unbeatable Deal on the Top Ultrawide Displays - Save $600 Now!
- Satechi Dual-Purpose Qi2 Charger Unveiled: Compact and Versatile Wireless Power Solution for Modern Gadgets
- Ultimate ITunes Troubleshooting Companion: A Comprehensive Q&A Resource with 100 Solutions
- Title: Creating Your Own DIY Bluetooth-Enabled Smart Speaker with Raspberry Pi
- Author: Kevin
- Created at : 2024-09-11 16:05:47
- Updated at : 2024-09-16 16:21:01
- Link: https://hardware-reviews.techidaily.com/creating-your-own-diy-bluetooth-enabled-smart-speaker-with-raspberry-pi/
- License: This work is licensed under CC BY-NC-SA 4.0.